This is an important step in positioning your art so it sits in the right position and allows your artwork to sit upright when hanging.
1. Wash your hands with soap so that you remove any dirt or oils that may stain your frame or artwork.
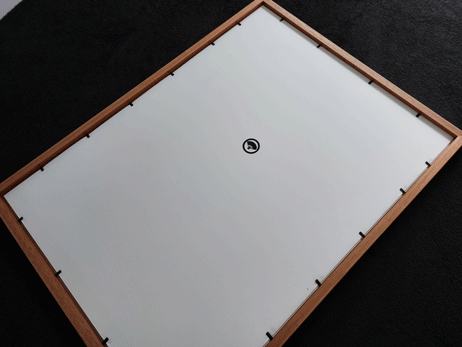
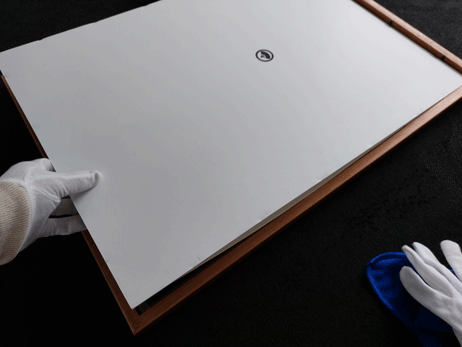
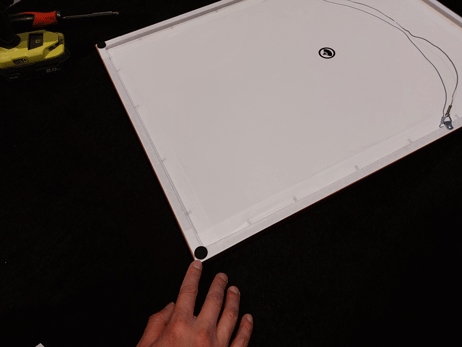
2. Gently take out your frame from the box and place it on a soft flat surface with the glazing facing down.
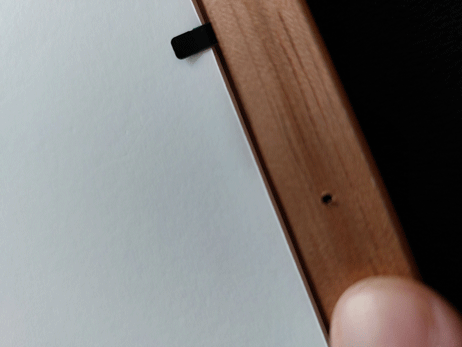
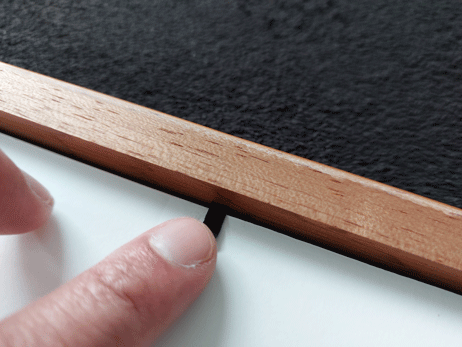
3. Lift and bend back the flexipoint nails using your fingers (don’t use anything hard that will scratch or puncture the backing board). Make sure to bend the nails all the way back so that you can take out the matboard and backing board easily.
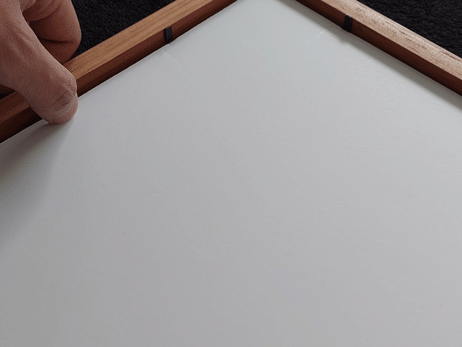
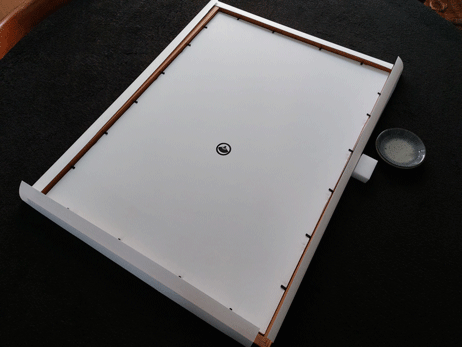
4. Take out the backing board by gently lifting the frame and tilting it on one side. From underneath, push the glazing up so you can access the backboard. Gently remove the backing board and place it on a flat surface.
6. Take your artwork and place it face down on top of the backing board.
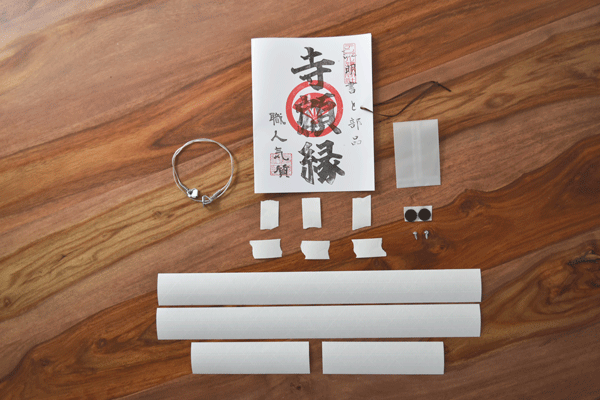
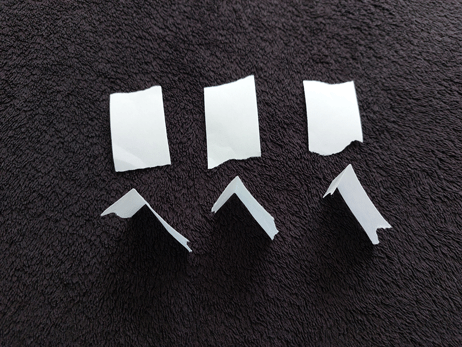
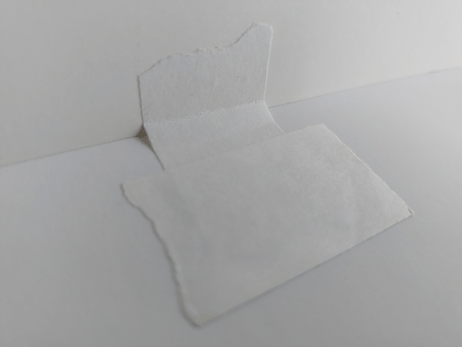
7. The next step will be attaching the hinges to your artwork. Take out the hinging tape that is in the framing kit. You will find 3 folded strips for ‘V-hinges’ and 3 reinforcing strips of hinging tape that are torn rather than cut. Tearing hinging tape will ensure a feathered edge and make it less likely to be visible on the other side.
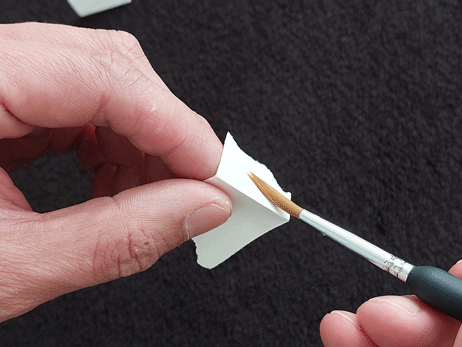
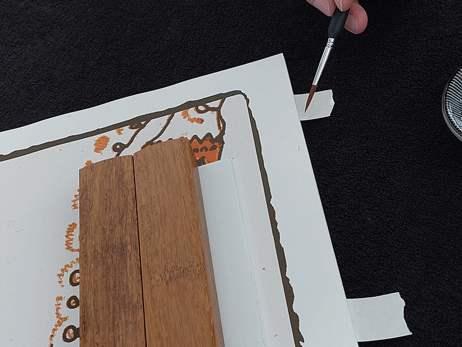
8. Moisten the short side of the V-hinge with water using a brush, sponge or finger. Make sure you are applying water on the gummed side (shiny side). Wait about 10 seconds for the adhesive to activate.
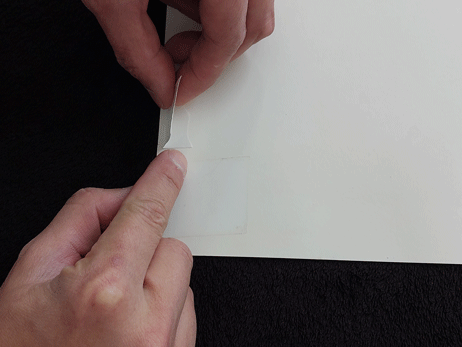
9. Place the sticky side of the V-hinge about 2mm from the top of the artwork and about 3cm from the left edge of the artwork. This will ensure that the past line is low enough behind the artwork so that the hinges won’t show when folded behind. Apply light pressure using your fingers and being mindful of not leaving an impression on the artwork.
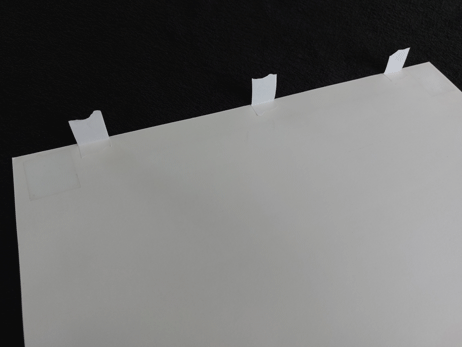
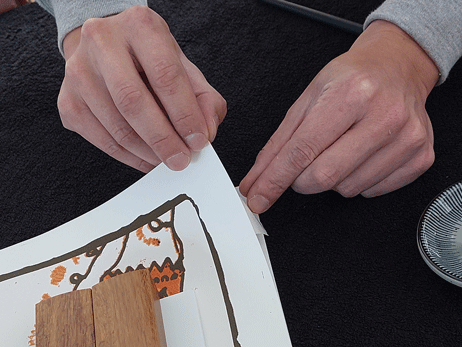
10. Do the same to the right side. If required, do one in the middle of your art (usually for bigger artwork)
11. Straighten the V-hinges so they are flat and turn your artwork over so that it is facing up. Make sure that the artwork is sitting directly on top of the backing board.
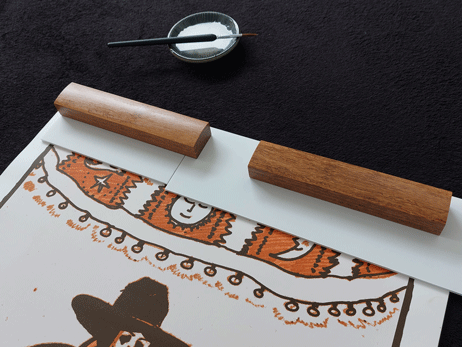
12. Once the artwork is centred and on top of the backing board, place some weights on top of a piece of paper to hold the artwork in place.
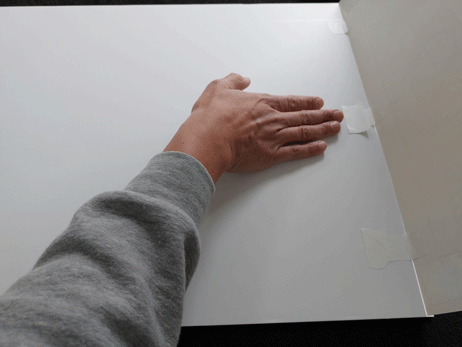
13. Moisten the long side of the ‘V-hinge’, lift the artwork slightly, and fold the hinge back under the artwork. Use your fingers to apply pressure to the hinge.
14. Do the same thing for the remaining hinges and weigh the hinges down for 15 minutes to ensure the hinges are set.
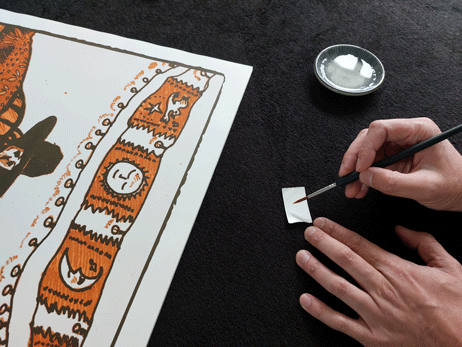
15. Once the hinges are dry, the next step will be to reinforce the V-hinges so they are more secure. This time, moisten the entire hinging tape.
16. Lift the artwork and place a moisten cross strip of tape to reinforce the hinge. Do the same thing for the remaining strips.
17. Place weights on top of the hinge and allow the adhesive to dry. We recommend leaving it for an hour.
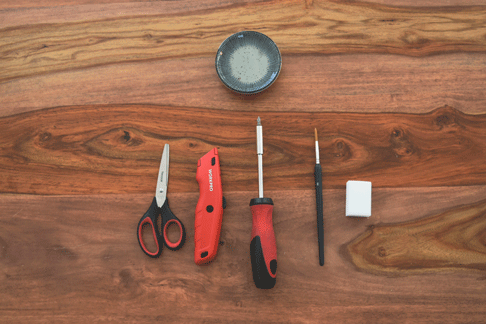
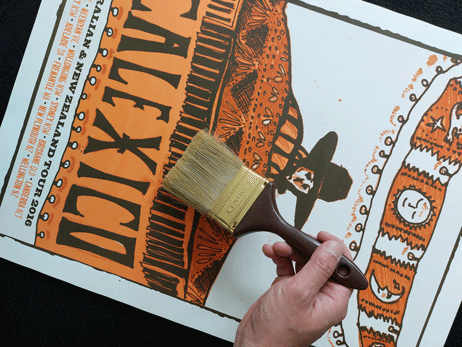
18. Before putting your artwork into the frame, double check that the artwork is positioned the way you want. Check for any dust, hair or any unwanted matter before you seal your frame. You can use a brush to clear any dust.
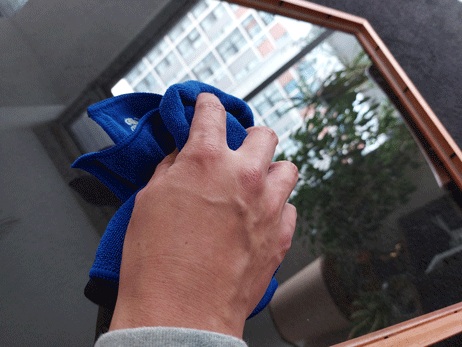
19.Wipe the glazing on both sides to ensure there are no fingerprints. Don’t use glass cleaner for acrylic. Only use water or acrylic cleaner with a microfibre cloth.
20. Place the artwork, matboard and foamboard back into frame. Make sure that you are putting the artwork the right way up. The holes for the d-rings side of the frame will help you identify which way is up. The holes are always closer to the top of the frame.
21. Pull down all the flexipoint nails so they are flat against the matboard.
STEP 2: Seal the back of your frame
Sealing your frame helps protect your artwork from humidity, air pollutants, dust and insects that can damage your artwork.
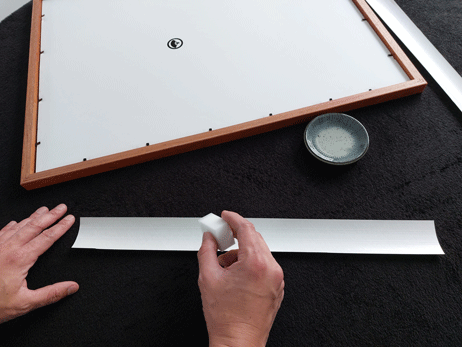
1.In your frame kit, you will find 4 x 48mm wide sealing tape strips. Two of the strips will be for the top and bottom of your frame and the other two will be for the left and right.
2. Use a moist sponge, brush or finger to moisten the whole length of the first strip. Make sure to moisten the whole strip well. This will ensure a good seal. Once you’ve moistened the tape, wait a few seconds for the adhesive to activate.
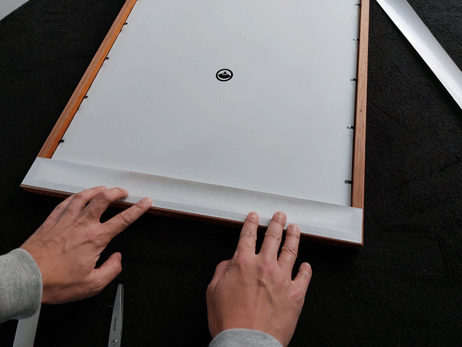
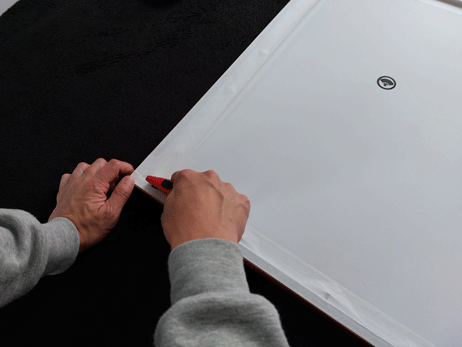
3. Place the adhesive roughly about 2mm away from the edge of the frame, starting on one corner and finishing on the end corner. To avoid any creases or wrinkles smooth out the length of the tape by starting in the middle and moving outwardly towards the edges.
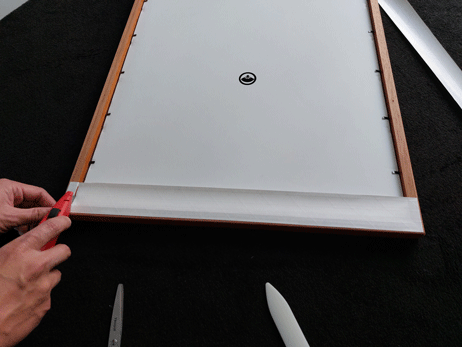
4. Using a utility knife or scissors, cut along the edge of rebate on both sides.
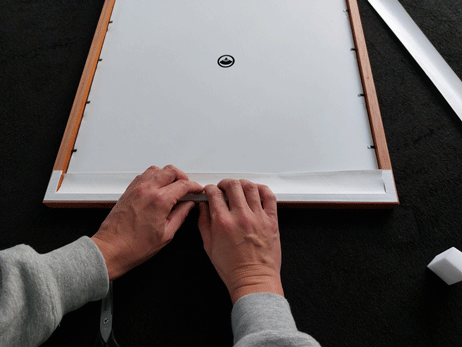
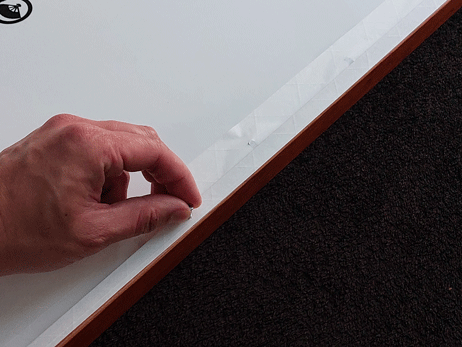
5. Crease the paper along the edge so that it is easier to fold
6. With your fingers, push the tape into the rebate. To ensure a good seal, use a burnishing tool, or your fingers to smooth out any creases. A good seal will adhere and make firm contact with all the contours of the frame back.
7. Repeat these steps on all four sides of the frame.
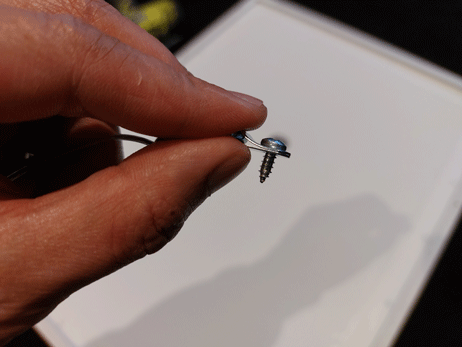
8. The sealing tape will cover the pre-drilled holes for D-rings. You can use the screw in your framing kit to mark the spot where holes are so you can locate them easily when it comes time to install the D-rings.
STEP 3: Attach D-rings and hanging wire
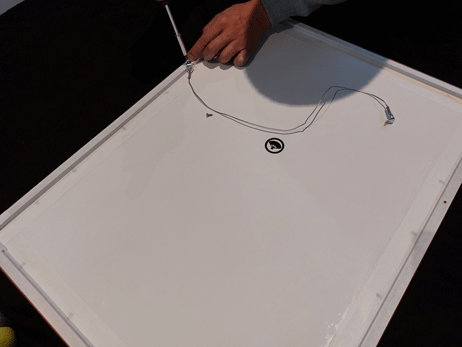
1. In your framing kit, you will find the D-rings, two panhead screw and hanging wire. The hanging wire is already tied to the D-rings, so all you will need to do is use a Phillips head screwdriver to screw the D-rings into the pre-drilled holes in the frame. The flat side of the D-ring should be in contact with the frame.
STEP 4: Attach felt bumpers
Felt bumpers allow for air circulation to to flow behind the frame. This helps prevent build up of moisture, mildew growth and frame damage. Additionally, it helps protect your walls from scratches and markings.
1. In your framing kit you will find two felt bumpers. Remove them from the backing sheet and place them on the bottom corners of your frame. Place the bumpers so they are well inside the edges of the frame so that they are hidden behind the frame.